
For certificates that arrive by email, or that you already have on a drive. Same result as a contractor uploading it themselves.
-
Open the Insurance tab
Open the contractor and click the Insurance tab.
-
Add the file
Drop the file onto the upload area, or click it to browse. PDFs and images both work — a photo of a certificate is fine.
-
Wait for it to be read
The certificate is read as it uploads. This takes a few seconds; the card shows it working and then fills in with the carrier, coverages, limits and dates it found.
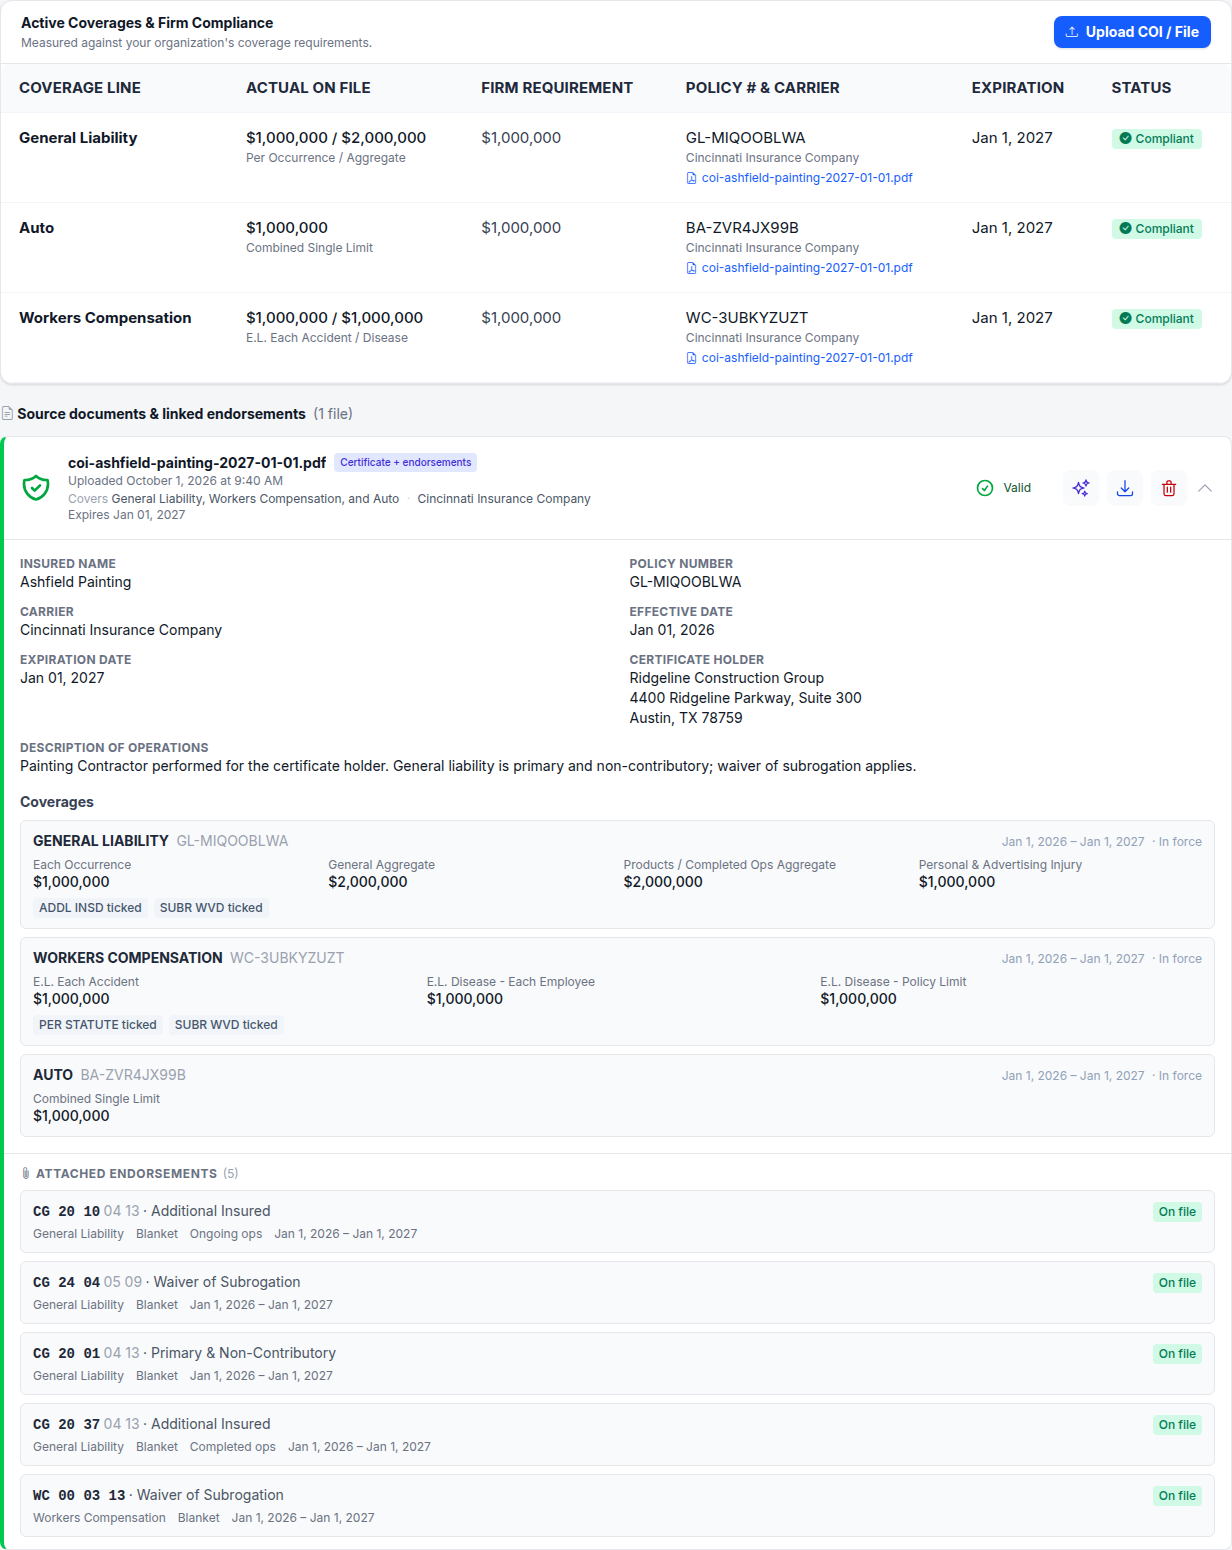
- 1 Every coverage line, against what you require
- 2 The certificate each line came from, one click away
- 3 What was read off it, coverage by coverage
What happens on its own
- Coverages, limits and per-policy dates are extracted.
- They're checked against your required coverages.
- The contractor's status updates.
- Expiry dates go into the alert schedule, so reminders fire before they lapse.
You don't have to type a date anywhere.
Note
Uploading a new certificate doesn't remove the old one. Both stay on the record — the old one becomes history, which is what you want when someone asks what cover was in force last spring. See the all-expired rule for why that doesn't make anyone Non-Compliant.
What happens next
Glance at what was extracted before you move on: Review and correct a parsed COI.